
Are you tired of leaving the background of your coloring pages blank? Even a plain-looking design can be turned into a piece of art if the background technique is done right. In this article, we’ll show you how to take your coloring skills to the next level with some amazing coloring techniques for backgrounds for beginners.
Keep reading to learn about the beginner’s guide to blending, chalk technique, stippling, and much more.
Coloring Techniques For Backgrounds For Beginners
Before we dive into the coloring techniques for the background, let’s understand what difference it makes.
Backgrounds play a crucial role in design. They can completely transform your graphics and give them a finished look.
Here’s why backgrounds are important:
- Backgrounds form the base of a good design.
- Background textures and colors add depth and contrast, making your graphics eye-catching.
- Backgrounds provide context to your design by adding visual elements that support the main content.
In simple terms, backgrounds are like the foundation of a building; they provide support and make your designs more appealing and meaningful.
Here are some techniques for background coloring:
Blending
This technique is perfect for background coloring, and you can create a really soft tone to add some depth to your artwork.
Beginner artists can try blending two or three shades of one color. You begin with the lighter color first. Then, you use the darker color, starting from the inside and going towards the outside on top of the lighter color.
After that, add the darkest shade at the end. Some colorists use colorless blenders to easily layer and blend their colored pencils.
Watch this video to learn different techniques of blending.
Black background
To add an exciting twist to your coloring pages, here’s a fantastic idea: creating dramatic black backgrounds.
This technique not only adds a touch of drama but also makes the colors in your artwork pop with vibrancy.
Let’s dive into how you can easily achieve this effect and make your coloring pages truly stand out.
You’ll Need:
- Black Pencil (e.g., Faber-Castell)
- Fine Black Pen (Pitt Pen)
- Brush-tip Black Pen (Pitt Brush Pen)
To create a dramatic background for coloring, choose a suitable coloring page and gently apply a black pencil to the area you want to darken.
Then, outline this area using a fine black pen for clean lines. Fill the remaining space with a brush-tip black pen for a rich black background, allowing it to dry for about 15 minutes.
If desired, add another layer for extra darkness. You can experiment with different colors too.
Pro Tip: Practice on scrap paper if you’re new to this technique. Importantly, it won’t bleed through to the other side of the page, making it beginner-friendly and enhancing your coloring experience.
Here’s an extra tip: After making your black background, you can take a white gel pen and add stars, dots, or other shapes. This will make it look like a starry sky or a galaxy. It’s a fun way to add some extra magic to your coloring!
Watch this video for better understanding.
Stippling
Stippling is a coloring technique where you make a background by putting lots of tiny colored dots.
The dots can be close together for dark areas or farther apart for lighter ones. You can use a fine marker or a sharpened pencil for this.
Here’s an extra tip: Instead of putting colored dots in the background, you can also try making dots directly on the drawing. To do this, you can practice using fine liner pens.
These pens let you make very precise dots on your artwork. It’s another fun way to add detail and style to your coloring!
Gradient
Gradients are a cool thing to do with watercolors. It’s about making colors blend smoothly from one to another, like in pretty sunsets or skies.
The trick is to use plenty of water. If you don’t, your painting will look streaky, and the colors won’t mix nicely. So, don’t be shy with the water!
If you’re using just one color, start with a dark part and make it lighter by adding more water. Put the light color next to the dark one, and use your brush to mix them until it’s smooth.
For two colors, like blue and purple, start with pure blue on one side and pure purple on the other. In the middle, put the mixed color. Mix them, and don’t let the pure colors dry.
You can even use three or more colors; just make sure you only mix two at a time. Don’t let it get all muddy!
If you see lines in your painting, try tilting your paper while you paint. This helps the colors blend better. Tilt it down so the paint flows down, not across.
Gradients can make your background look fantastic, so practice and have fun painting beautiful skies and landscapes!
To get more idea about the gradient background technique, watch this video.
Wet on Wet
Wet on wet is a cool way to use watercolors. It’s when you paint wet stuff on other wet stuff. You don’t need fancy tools for this; regular watercolor stuff works fine. But good paper is important because bad paper gets all wavy when it’s wet.
There are two ways to do wet on wet. One is the touch way. You make two wet spots on dry paper and let them touch. The paint goes from one spot to the other, making nice colors mixing.
The other way is the drop-in way. You make one wet spot on paper. Then, you use a wet brush with a different color and drop it onto the wet spot. The colors mix and do cool things.
It’s fun to play with these ways. The paper should be good, or it won’t work right. You can make pretty art wet on wet. Learn more about this technique here.
Dry Brushing
With a dry brush, you use very little paint. You can adjust the amount of paint on your brush to make it your style.
You can also use a paper towel or sponge to remove some paint from the brush, giving your background more texture. Dry brushing works well when you’re layering paint.
When you do dry brushing, the point is not to cover everything perfectly. You want it to look uneven and rough like it’s old and has been outside.
Chalk Technique
To create interesting backgrounds in coloring books or artwork, you can also consider using chalk, specifically sidewalk chalk.
While there are a few ways to work with sidewalk chalk, it’s an accessible option. You can either directly apply the chalk to your paper, but keep in mind this can create a bit of dust.
To minimize this, you can use a Q-tip to apply the chalk, giving you more control.
Another method is to load up a Q-tip with chalk and gently rub it on your paper in small circles, which can help spread the color and texture.
However, working with chalk may leave visible lines where the chalk was initially applied. These lines can be part of your artwork’s texture, adding interest.
To preserve your chalk artwork, consider using a fixative spray after you’re done to prevent smudging.
Remember, practice and experimentation will help you get the hang of this technique. Additionally, you can explore other background techniques using different materials like colored pencils, gel pens, or pastels for more variety in your artwork.
Conclusion
Backgrounds can enhance your coloring, add depth, and make the colors pop. However, they can be intimidating, especially if you’ve already colored the main picture.
You might worry that adding a background could spoil your work or alter its appearance after you’ve spent a lot of time and effort on it.
With the easy coloring techniques for backgrounds for beginners mentioned above, we hope things become easy for you.
Links To Related Articles
Coloring For Adults 101: A Beginner's Guide
Discover color theory, coloring techniques, the best coloring supplies, the incredible health benefits of coloring, and much more. Start your creative journey today! Click here to read more!

How Do I Choose A Color Palette For My Coloring Book?
Choosing colors for an adult coloring book can be both challenging and overwhelming. Here are some methods by which you can choose colors to give you the courage to draw lines on any coloring book. Learn more here!
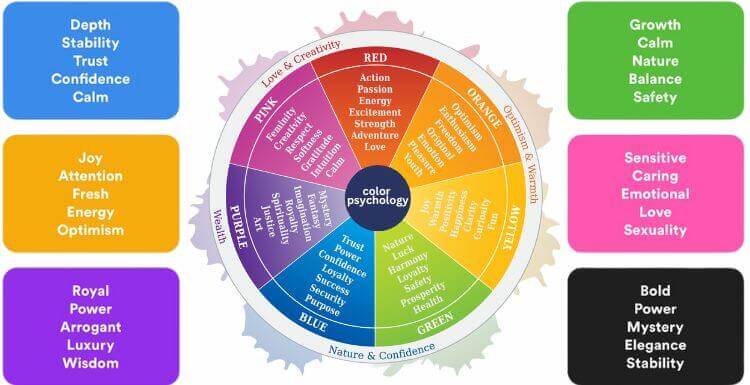
What Is Color Psychology? How Color Impacts Mood and Creativity
Did you know you can get hungry or dizzy by colors? Also, different colors are more likely to get you a job? Learn more here!
FREE COLORING PAGES!
Sign up here to get a collection of some of our favorite coloring pages for free. Unsubscribe at any time.
